Once again we had Kalika create amazing nail art to go with this weeks look. By the title of this post I am sure you guessed that these are for a witch makeup look. Come back tomorrow to check out the final look! ****All photos were taken by the lovely Nicole Ashley
Read Morehalloween makeup sneak peek look 3
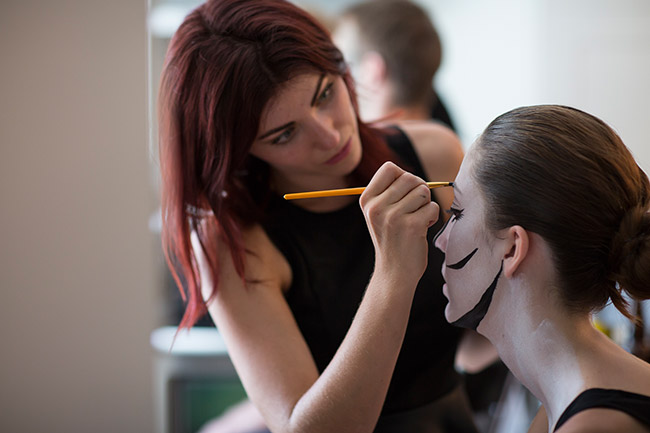
Today we are so excited to bring you the third installment in our Halloween makeup series. Check out these behind the scenes photo’s and try and guess what look we tried to achieve. ****All photos were taken by the lovely Nicole Ashley
Read Morewallflower halloween makeup
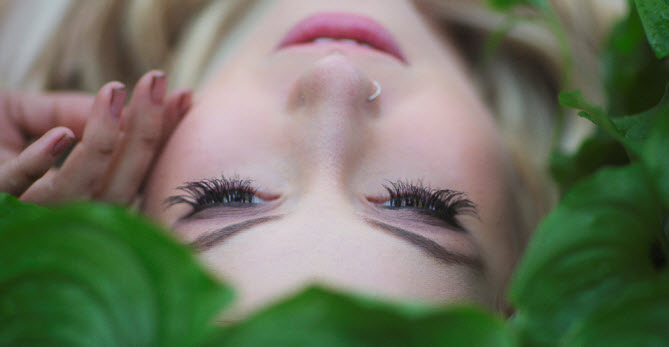
If you couldn’t guess from this weeks behind the scenes and nail art photos this Halloween makeup look centers around floral. Most people who know me know that I love floral so it shouldn’t come as a huge surprise that I worked this floral wall paper makeup look into one of the four looks that we were going to create. I even have floral incorporated into almost every room in my house which was showcased on Kristina’s blog. For this look I evened out the models face then went in with my Make Up For Ever Flash Palette and hand painted the flowers and vines on her face. You would definitely not be labelled a wallflower in this makeup. Model: Claire B. for Numa Models MUA: Janna Huget Hair: Stefanie Carlson Photography: Nicole Ashley
Read Morefloral nail art
For the next look in our Halloween Makeup series we asked Kalika if it would be possible for her to create some floral nail art for our model to wear. She really came through for us and hand painted these amazing nails to go along with the look. Make sure to come back tomorrow to see the final images from this look!
Read Morehalloween makeup sneak peek look 2
Last week we featured our pop art Halloween makeup look and this week we have an exciting new look to showcase. Here are some sneak peek photos of the look coming together. ****All photos were taken by the lovely Nicole Ashley
Read Morepop art halloween makeup
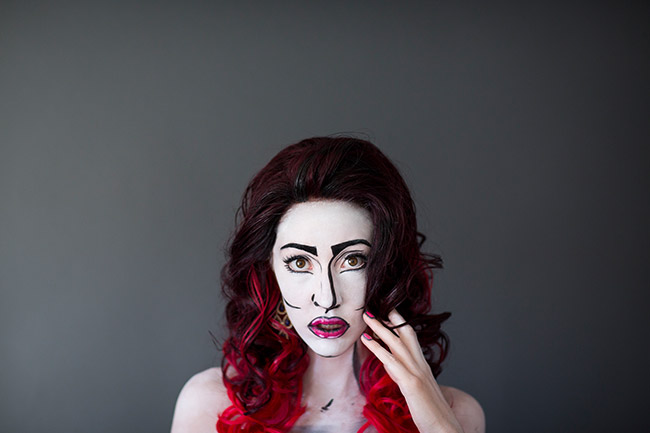
You have seen the behind the scenes, the pop art nail art, and now here is a look at the finished product! Marissa was such a trooper as I applied and re-applied this makeup, each line was carefully added and it was like she didn’t breath. I have wanted to try cartoon like makeup for quite a while now, but it wasn’t until I found the amazing Karla Powel’s pop art post until I was fully inspired. I started by slicking all Melissa ‘s hair back into a ponytail. Used a matte primer, and began painting her face white. I then set her face and began adding the black face expressions, finishing with lips and lashes! it was a bit of a challenge working against heat, and sweat, but I am really happy with the finished result! Thank you for taking the time to look at my pop art halloween makeup! Model: Marissa H. for Numa Models MUA and Hair: Stefanie Carlson Photography: Nicole Ashley
Read Morepop art nail art
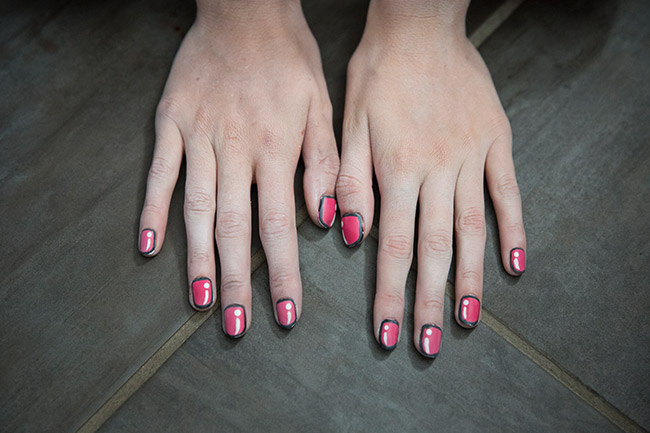
Pop art nail art. Say that 10 times fast! We were so happy to have included miss Kalika Martin with our pop art look by using some amazing nail art! Using acrylic nails she started by painting the entire nail bed with a solid pink tone. Once dry white was added around the edges and centre to create the ‘pop art’ effect. Once the nails were completed- I simply glued them onto our stunning model, and voila! A huge thank you to Kalika for her involvement in this shoot. And stay tuned for the complete look on Friday!
Read Morehalloween makeup sneak peek
It may come as a shock that Stef and I work in the beauty industry and thus love trying our hand/brush/wand at new things. Not shocked? Alright fair enough, this is a beauty lifestyle blog. So, with Halloween just around the corner we decided to create four unique makeup and hair looks that would be perfect for anyone to dress up as – very generous of us, we know. In the weeks leading up to Halloween you can look forward to the Halloween makeup posts (one a week) that we will be yours for the taking! Today we will leave you with a few sneak peek shots of our first look that will be up on the site later this week. ****All photos were taken by the lovely Nicole Ashley
Read Morebold lipsticks and ways to wear them
The other night over waiting for others to join Stefanie and I at a dinner meeting, I happen to notice and compliment the pretty lip colour Stef was rocking. The soft hint of orange looked so natural and pretty. Naturally, I asked her what lipstick she was wearing and she said it was MAC Pro Longwear Lipcreme in Good to Go. I would have NEVER guessed (and that’s alarming coming from a girl who works at MAC) that the shocking neon orange bold lipstick was the color Stef was wearing! Our dinner meeting was with web guru Paul Letourneau and our friend Kristina who is also starting a design and styling blog. I did a post over on one of Paul’s new blog’s I’m a Girl about embracing your inner girl and truly accepting the fun meant to be had with makeup, and that post gave me an idea to expand on. From working at MAC I’ve come to know that people are generally afraid to try on a super dark or really bold lip so I wanted to show the different ways you can rock some of the most popular MAC lipsticks. The inner deal-seeker in me appreciates how bold lipsticks actually give you more bang for your buck in that you can wear it at least 3 different ways! Put on a lipbalm then just take a bit of the lipstick on your ring finger and press it into your lips. This gives you the look of a lipstain. Once again put on lip balm then take the lipstick and apply it directly to only your top lip and press your lips together. This will be bolder than the first look but the color not as full on as the lipstick could actually go. Take some lipstick on a lip brush and carefully fill in your whole lip then blot with a tissue. Go back over your lips with a second coat using a lip brush and blot again. This is as bold as the lipstick can look without adding a lipliner and will last you several hours. Photos taken by the lovely Nicole Ashley
Read Moremakeup packing list
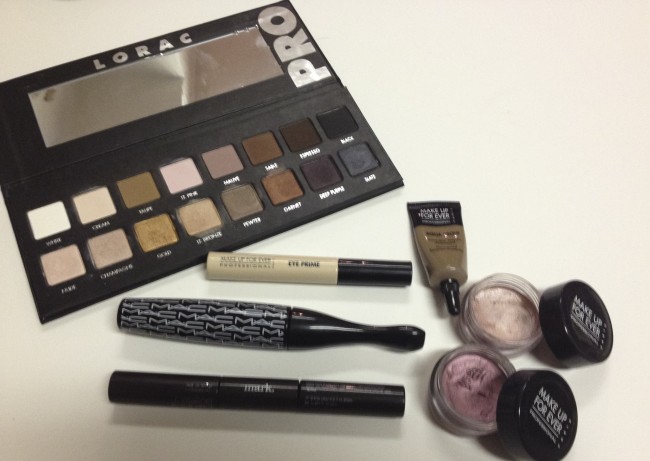
Tomorrow I finally head off to Montreal with a bunch of friends in pursuit of hot weather, shopping, French food, exploration and ultimately the music festival Osheaga. I decided I should write up a makeup packing list to share my hot weather makeup tips with you and mostly, of course, to ensure I don’t forget anything – I am unashamed to admit I am blonde after all. Since I was graced with being of the super pale variety in combination with very oily skin, my philosophy for makeup in hot weather includes SPF, anything matte-ifying and a bold lip. Keep it simple but still put together. Lets be real…. I am a makeup artist so I probably have in my bag a dozen more things than the average female. To save some space in my luggage I decanted most of the products I am bound to use into small sample cups. Traveling with me is my friend Kristina and she posted a blog post too with some festival packing lists so make sure to check it out! Face MAC Prep + Prime Face Protect SPF 50 (not pictured), Hourglass Mineral Veil Primer SPF 15, Hourglass Immaculate Liquid Powder Foundation, MAKE UP FOR EVER full coverage conealer, MAC Mineralize Skin Finish Natural Cheeks Diorskin Shimmer Star in Amber Diamond, Sample size of Tarte Mineral Powder Bronzer , cheek stains give oily skin the longest wear time of any blush I have ever tried. I am bringing along my 2 favourites of the moment: Jose Maran Coconut Watercolor Cheek Gelee in Berry Bliss and Hourglass Aura Sheer Cheek Stain in Petal, and MAC Mineralize Blush in Warm Soul Eyes Lorac Pro Palett, MAKE UP FOR EVER eye prime, MAKE UP FOR EVER Aqua Brow, MAKE UP FOR EVER Aqua Cream in #16, and 17 (all of the MAKE UP FOR EVER products I am bringing are waterproof which is essential in the Montreal humidity), MAC In Extra Dimension Mascara , Mark Waterproof Liquid Liner in Painted Black and Bronze To set all my makeup and make it waterproof I am bringing along my trusty Kryolan Setting Spray (not pictured Lips SPF for your lips is crucial so I purchased the Fresh Sugar Lip Treatment with SPF 15, For lipsticks I am bringing MAC To the Future, Viva Glam Nicki, Candy Yum Yum, Violetta, Lush Life, Heaux
Read More