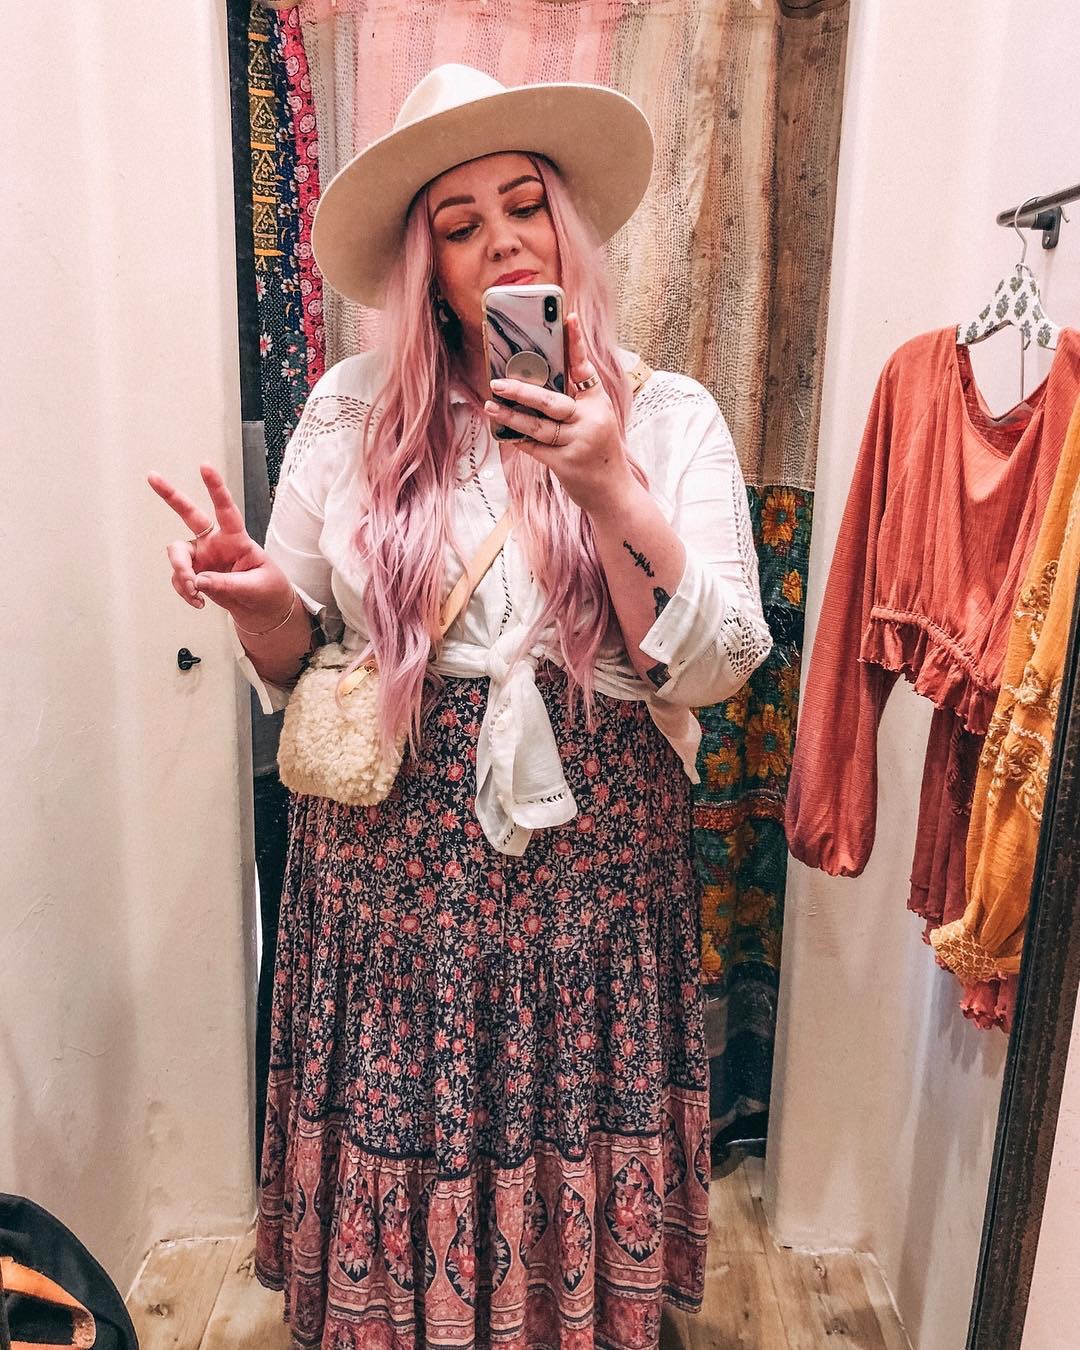
Sometimes when you get blonde hair extensions you may want them to be a bit cooler/icier in tone or in my case I needed to transform the hair extensions from blonde to pastel pink. In this post, I wanted to cover how to tone the blonde extensions to get them cooler in tone and then also how to make them pastel. I received the clip in extensions from UniWigs and I have to say I was really impressed by how soft and thick the blonde extensions were all the way down to the ends. Over the years I have been styling hair I’ve seen good hair extensions and sub-par hair extensions and I can say with confidence that the clip in hair extensions by their company are very high quality. After you have the hair extensions toned to match your current hair colour following the steps below I highly recommend taking them with you to your next hair appointment to have your hairdresser blend them with your hair so that they look even more natural. We are going to be creating some more tutorials and videos on how to place your clip in extensions in your hair and how to style them so stay tuned!
Blonde Steps:
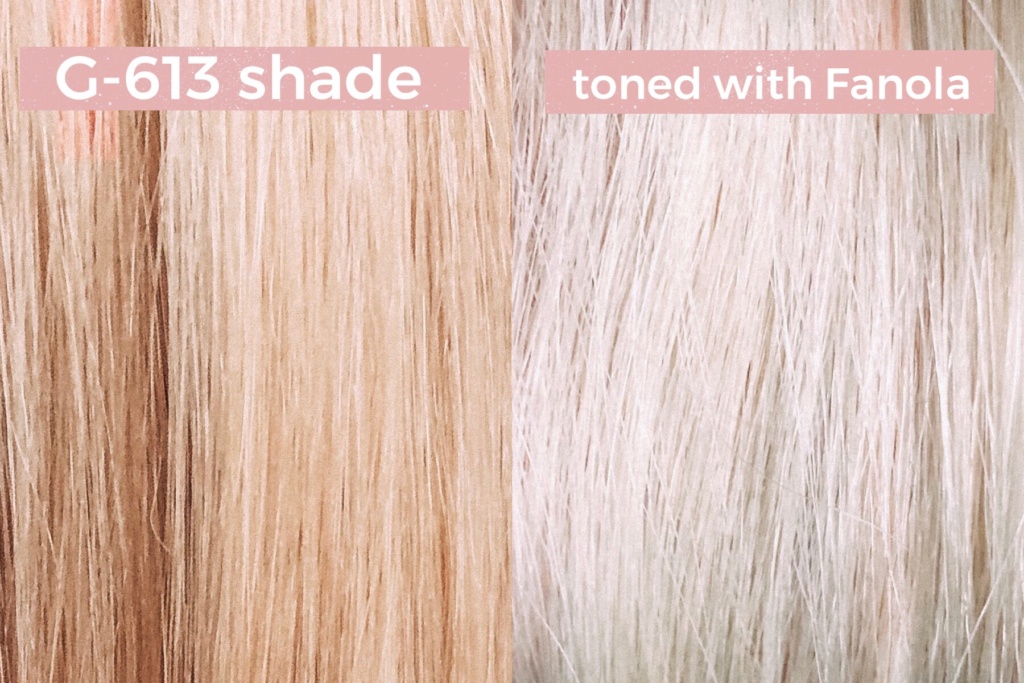
- Order the whitest hair extensions you can find and in my case, I ordered the 24-inch White Blonde Human Hair Clip In Extensions in the shade G-613. ** It is really important to purchase real human hair instead of the synthetic or synthetic blend version because the real hair extensions will tone without issues and you can also heat style them.
- Fill a large bowl about 3/4 full of warm water.
- Add in 2-3 squirts of the Fanola No Yellow Shampoo into the water and swish the water around with your hand until it is all mixed in and you get the water a purple colour.
- Add the hair extensions into the bowl and submerge them in the water. Keep an eye on the hair extensions as they turn cool in tone very fast. It took me about 5 minutes of the hair being submerged to get the tone I wanted.
- Rinse the hair extensions under your tap and then add some conditioner to the ends and then rinse again.
- Add some hair oil and detangler if needed to the mid-lengths to ends of the hair extensions and gently brush them out.
- I usually prefer to leave the extensions brushed out and laid on a towel to air dry but you could also blow dry them to speed up the drying time.
Pastel Steps:
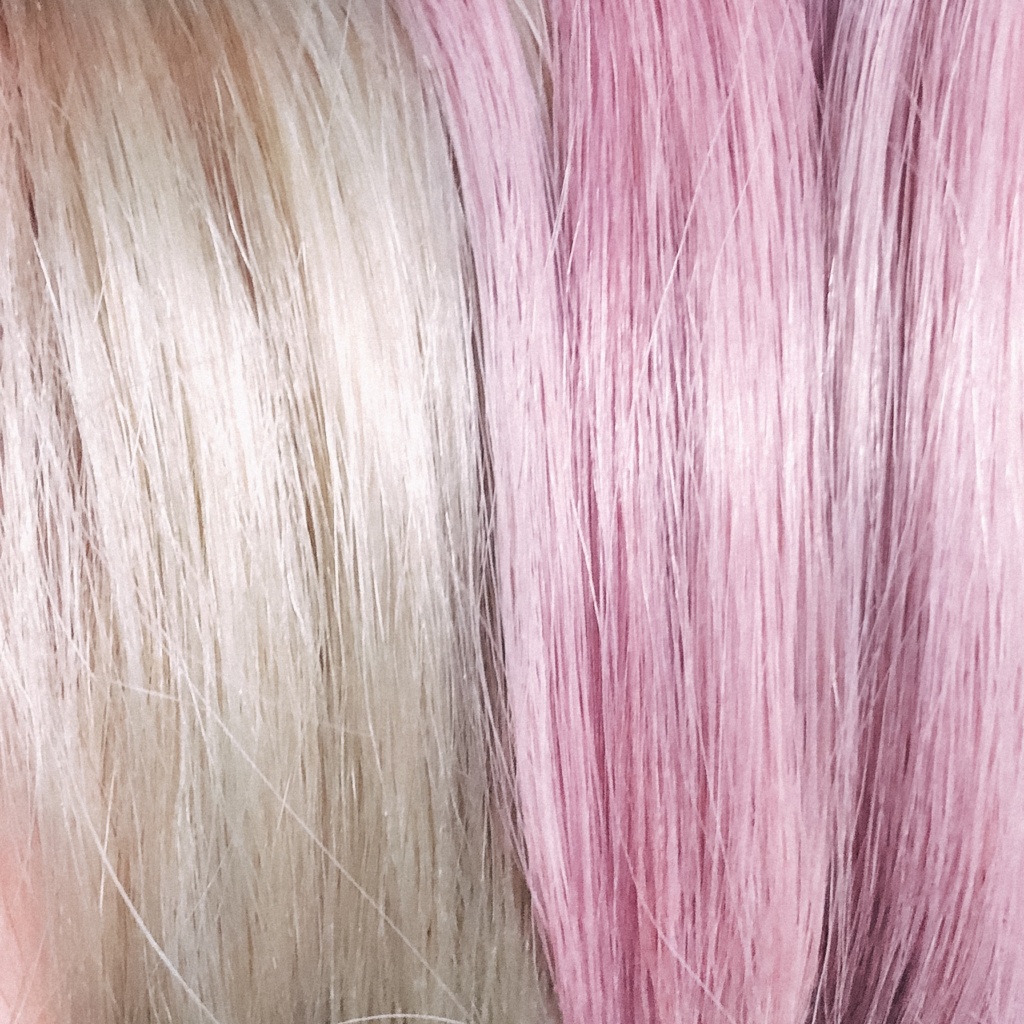
- Follow the steps above because you need to have the hair get as icy as possible to look like a true pastel.
- After the hair is toned a more icy blonde you can leave the extensions damp.
- For my purple/pink tone of pastel, I mixed 1 squirt of the Fanola No Yellow Shampoo with 2 squirts of the Celeb Luxury Viral Colorwash in Pastel Light Pink together in my hand. Celeb Luxury has several colours of colour depositing shampoos from silver, pink, purple, blue, red etc!
- Use the mixture of shampoo from the step above to massage into each of the hair extension pieces. I usually worked on one piece at a time as they tone very fast.
- Wait 1-2 minutes then rinse the hair extensions.
- If you haven’t reached the desired tone yet you can repeat the shampoo step again.
- Once you have the desired tone you can add some conditioner to the ends and then rinse again.
- Add some hair oil and detangler if needed to the mid-lengths to ends of the hair extensions and gently brush them out.
- I usually prefer to leave the extensions brushed out and laid on a towel to air dry but you could also blow dry them to speed up the drying time.
Adding a Shaded Root:
If your hair isn’t the same colour all the way to the root you may need to add in some shading at the root so that the clip ins blend a bit more. You could take them to your hairdresser to have them add a root or you can DIY it at home which is the method we did below!
- Have the extensions toned to the shade you need to match your current hair colour by following the steps above.
- Have someone hold the hair extensions up for you or use a “pant hanger” with clips to secure the extension piece.
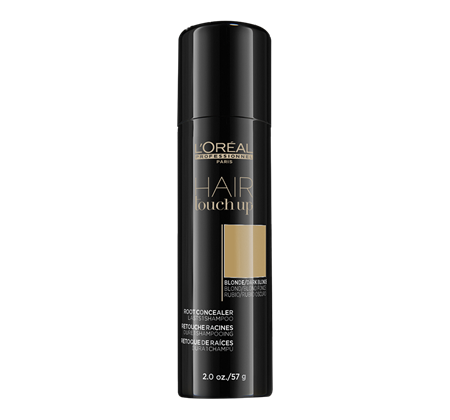
- Use a root spray that matches your root colour and spray the root part of the clip ins. Usually, you want to match your root length which in my case was about 2 inches. Repeat the steps on all the extensions pieces. The exact one we used on my hair extensions was the L’Oréal Professionnel Root Concealer in Light Brown. They have a lot of options of shades in the root concealer line and I’ve also heard good things about the Joico Tint Shot Root Concealer.
** This post and hair were sponsored by UniWigs but all opinions and content created are my own.
This is the link to the exact extensions I got: White Blonde Human Hair Clip In Extensions, Color: G-613 (Bleach White Blonde), Approx. Length: 24 inches, Pieces: 8″ (4 clips)-1pc, 7″ (4 clips)-1 pc, 6″ (3 clips) -3 pcs, 4″ (2 clips) – 2pcs
Use my coupon code: Janna15 for 15% off
Visit their Website, Instagram and Facebook to see their product in action!